
Running as a Windows Service
This guide will get you running Litestream on the Windows operating system as either a command line tool or as a background Windows Service.
Prerequisites
This guide assumes you have read the Getting Started tutorial already. Please read that to understand the basic operation of Litestream.
Running as a Windows Service
Running Litestream as a Windows Service means that it will run in the background and continuously monitor and replicate your databases. This is the recommended way to run Litestream.
Note: Litestream v0.3.x provided an .msi installer that registered the
service automatically. Starting with v0.5.x, releases ship as a .zip archive
and you register the service manually using the steps below.
Installing the binary
Download the Windows .zip archive from the Litestream releases
page. Choose the file matching your architecture—x86_64 for
Intel/AMD or arm64 for ARM:
litestream-0.5.14-windows-x86_64.zip
litestream-0.5.14-windows-arm64.zip
Extract the archive and copy litestream.exe to C:\Litestream. In
PowerShell (replace x86_64 with arm64 if you downloaded the ARM
archive):
Expand-Archive litestream-0.5.14-windows-x86_64.zip
New-Item -ItemType Directory -Path C:\Litestream -Force
Copy-Item litestream-0.5.14-windows-x86_64\litestream.exe C:\Litestream\
Creating the configuration file
When running as a service, Litestream reads its configuration file from:
C:\Litestream\litestream.yml
Create this file with your database and replica settings before starting the service. See the configuration reference for all available options.
Registering the service
Register and start the service from an elevated (Run as Administrator) PowerShell or Command Prompt:
sc.exe create Litestream binPath= "C:\Litestream\litestream.exe" start= auto
sc.exe start Litestream
Note that sc.exe requires the space after each = sign.
Managing the service
Whenever you update the configuration file, you’ll need to restart the service.
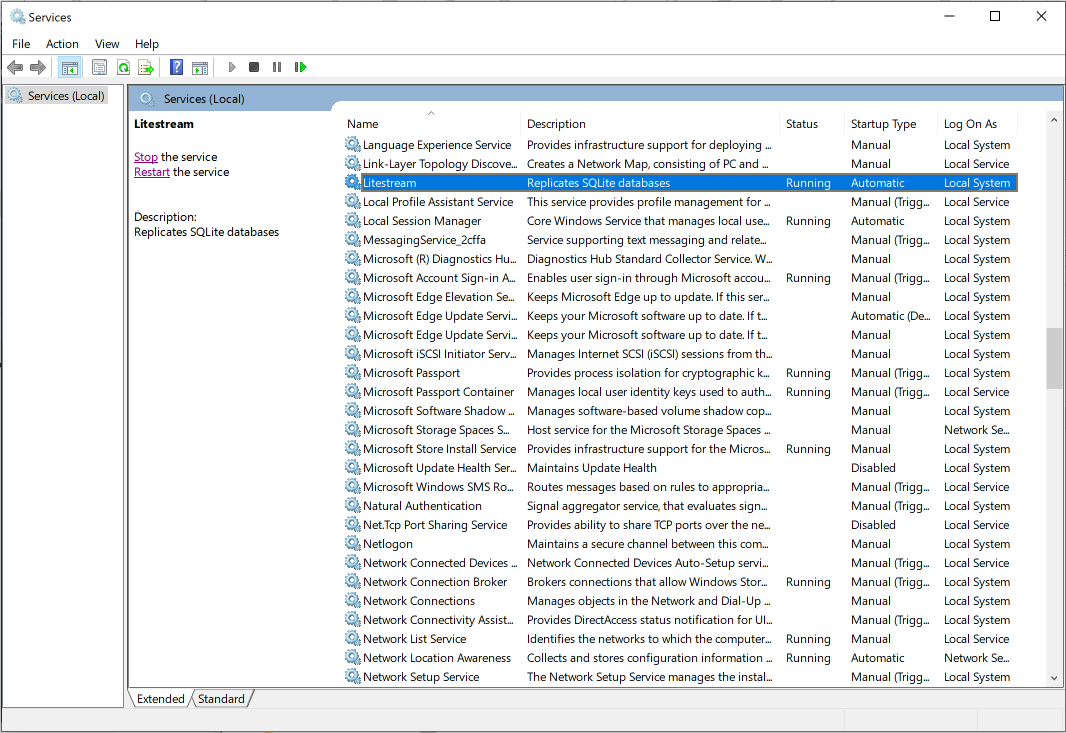
Go to the Services application and select the Litestream service. You should see links in the sidebar to Stop and Restart the service.
Viewing the event log
The Litestream service logs informational and error messages to the Windows Event Log during operation. You can view these events in either the Event Viewer application or you can view them from PowerShell.
In PowerShell, you can execute the following:
Get-EventLog -LogName Application -Source Litestream
This will show events in reverse chronological order:
PS C:\> Get-EventLog -LogName Application -Source Litestream

   Index Time          EntryType   Source                 InstanceID Message
   ----- ----          ---------   ------                 ---------- -------
    8894 Jan 01 00:00  Information Litestream                      1 replicating to: name="s3" type="s3" bucket="dev...
    8892 Jan 01 00:00  Information Litestream                      1 initialized db: C:\my.db...
    8891 Jan 01 00:00  Information Litestream                      1 litestream v0.5.14...
    8890 Jan 01 00:00  Information Litestream                      1 Litestream service starting...
Running from the command line
If you do not wish to run as a background service or you only need to perform a database restore then you can download the Litestream executable and run from the command line.
You’ll need to download the .zip archive from the Litestream releases
page, extract litestream.exe, and install it within your Windows
%PATH%. The executable will
use C:\Litestream\litestream.yml as the default configuration path but you
can override that with the -config flag.
All logging messages will go to the terminal window when running from the command line and the Event Log is not used.
See Also
- Getting Started - Introduction to Litestream basics
- How It Works - Understanding WAL, checkpoints, and replication
- Troubleshooting - Common issues and solutions
- Configuration Reference - Complete configuration options